How to Make Soap 101 – Homemade Soap Making for Beginners
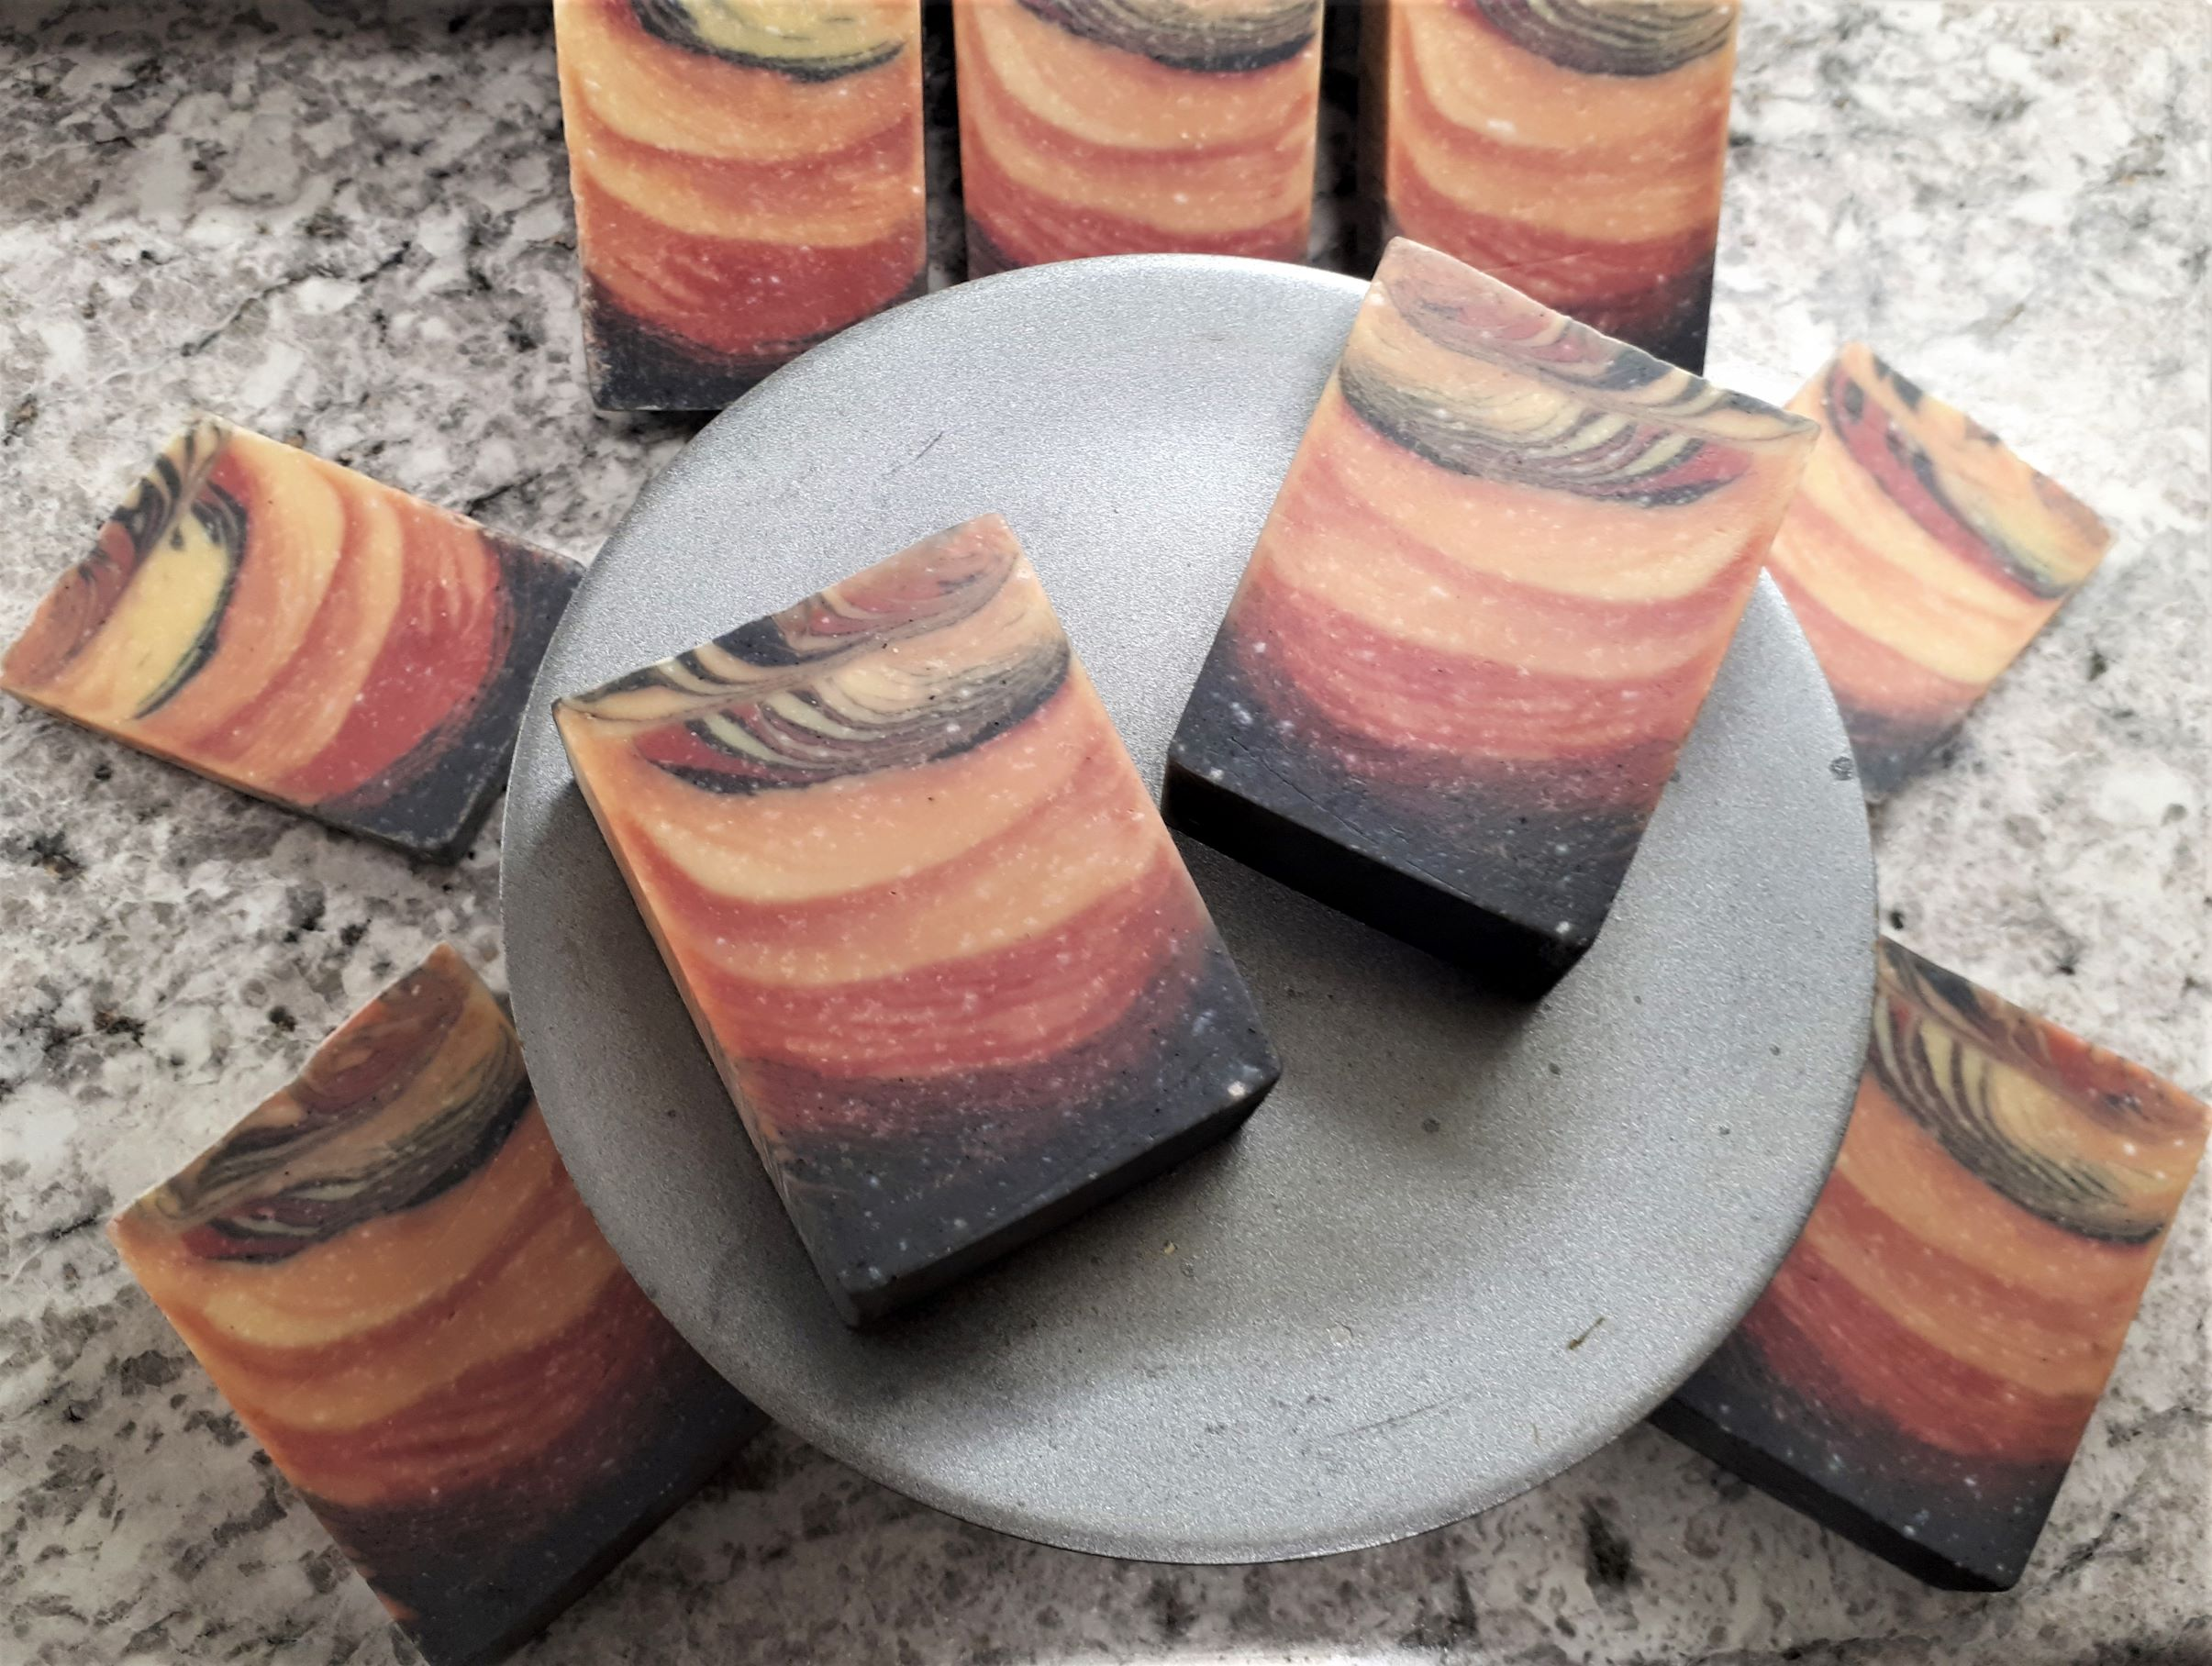
Image from Momma Hoot
There are several reasons people may want to learn how to make soap. While some choose to do so simply because it’s a fun and satisfying hobby, many people start making their own soaps to avoid undesired ingredients such as fragrances and synthetic detergents. Most commercial “soaps” are not 100% soap—they are detergent-based and have their natural glycerin removed, often labeled as beauty bars, cleansing bars, or face bars. Glycerin is a skin-loving ingredient, but it is removed from commercial soaps to increase shelf life and to be sold separately for lotion and skincare products. When you make your own soap, not only can you choose your preferred ingredients, but the glycerin in your soap remains intact. Some hobby soap makers opt to incorporate homegrown ingredients like lard or tallow, aloe vera gel, herbs, and liquids like goat’s or cow’s milk. You might decide to create organic or vegan soaps. Making your own soap allows YOU to select ingredients that suit you and your lifestyle.
While everyone seems to be familiar with what soap is, it does have a scientific definition. Essentially, soap is the salt of a fatty acid. From a chemical standpoint, “salt” refers to the substance formed through the interaction of an acid and a base. In soapmaking, the acid is a fatty acid (like olive oil) that combines with lye (usually sodium hydroxide) in a process known as saponification. Saponification is the reaction that converts oils/fats into soap through the interaction with lye dissolved in water. Although lye can be dangerous to use, and precautions must be taken to make soap safely, it is a necessary component in soapmaking. Contrary to some misconceptions, proper soapmaking ensures no lye remains in the finished product, as it is completely consumed in the saponification process, resulting in an entirely new substance: soap!
Soapmaking Preparation for Beginners (Collect your supplies)
- Nonreactive vessel to melt your oils on a stove or microwave (HDPE #2 or PP #5 plastic or stainless steel).
- Nonreactive pitcher or container to mix lye into water (NOT PYREX OR GLASS!!!!)
- Nonreactive utensils like stainless or silicone spoons for stirring
- Protective gear including safety glasses, apron, rubber gloves, and long sleeves
- A mold for your soap (if necessary, line it with materials like freezer paper, quilter’s mylar, plastic cutting mats, or silicone fondant mats) or silicone molds. Generally, soapmaking molds don’t need to be lined, but adhere to the manufacturer’s instructions if using a commercial soap mold.
- Consider an immersion blender for stirring/mixing the soap batter, as it can save time and labor.
- Soapmaking software: Due to the necessity for precise measurements for both oils and lye, always verify any recipe you find through a soap calculator. Each oil has a different saponification value and requires varying amounts of lye. Especially when substituting one oil for another, double-check the lye amount using a reliable calculator like the one found at SoapmakingFriend.com.
Soapmaking Safety Notes
- Soapmaking is generally straightforward but requires attention to detail.
- All ingredients, including liquids, should be measured by weight to ensure accuracy.
- Lye is caustic and must be handled with care. Employ safety goggles and protective clothing throughout the process. Note that lye mixed with water heats up quickly. Hence, always combine cold water or your chosen liquid with the lye—never use hot or warm liquids. Typically, use about 2 times the amount of water as lye, but a 2.5:1 ratio can be safer, i.e., use 2.5 times as much water, by weight, as lye.
- Although labeled ‘cold process’, the soap batter becomes hot. Have hot pads at the ready, along with protection for your counters.
- Mixing lye into water is a crucial step. Always add lye to water (snow falls on the lake is a good reminder technique), using a vessel taller than you think you need. Never add water to lye, as it can cause a dangerous eruption. Remember the phrase, “Add lye to water, just like you oughter”.
- Measuring is vital. Careful measurement ensures the proper balance of fats and lye, avoiding lye-heavy soap that can be harmful. Your scale should measure to the hundredth of an ounce for imperial measurements or the tenth of a gram for metric. Using grams for measuring lye is recommended for greater precision, although ounces can work with an accurate scale.
- Use only fragrances or colors specifically designed for soapmaking. Ingredients containing alcohol, like perfume, can cause the soap to seize. Certain fragrances may also alter the color of the soap. Always refer to the manufacturer’s guidelines when using unfamiliar fragrances or essential oils.
- As highlighted earlier, verify ANY recipe through a soapmaking calculator to avoid creating lye-heavy soap or wasting a batch due to insufficient lye. This brief verification ensures the safety and quality of your batch.
Basic Soapmaking Steps
- Gather equipment and ingredients.
- Measure lye and integrate it with the measured (weighed) water.
- Weigh the oils, melting the hard oils first before adding the soft or liquid oils, so all are combined.
- Gradually add the lye water to the oils, stirring continuously.
- Stir until reaching trace, a stage where dragging your spoon across the soap batter leaves a line or a ‘trace’ behind.
- Pour the mixture into your prepared molds.
- Once cooled and firm, cut into bars and place on a rack to cure for 4-6 weeks.
Your First Soap Recipe
Now you’re equipped with the necessary knowledge and tools, we need a recipe and ingredients. The following recipe, sourced from the ‘sample recipes‘ on SoapmakingFriend.com, utilizes ingredients readily available at your local grocery or drug store.
A typical soap recipe looks like this:
- 60% Lard
- 20% Coconut oil
- 20% Olive oil
- Superfat at 5% (Superfat is the amount of excess oil used to ensure that all of the lye is used up, so the soap is not lye heavy, and the excess fat is conditioning to the body)\
A good start is this recipe for new soapmakers: Easy 3- Oil First Soap – Beginners Soap Recipe
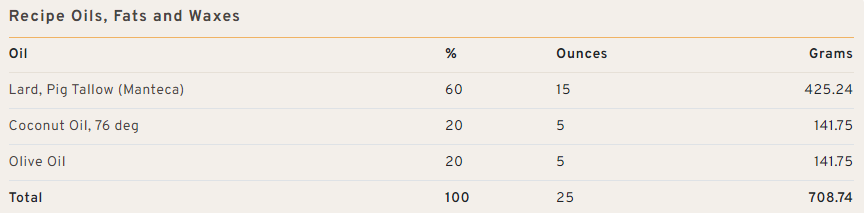
You will notice that the recipe page gives you a lot of information about the make up of the oils, and the qualities including cleansing, hardness, bubbles, lather, etc. For now, seeing that your recipe is in the general recommended percentages of each of those properties is great. Once you get more experience, you can vary this by your preference as you learn to formulate your own recipes.
You can see that the amounts of the oils are calculated for us by entering our percentages. The recipe also calculates the lye amounts and water amounts as well, so we are ready to go!
The printed page gives us all we need:

Get Started! Steps to Making Your First Batch of Soap
Step 1 – Find your recipe and run it through a soap calculator. Have all your ingredients handy as the process can go quickly. Keep a pen nearby to check off the ingredients as you use them.
Step 2 – Put on your goggles and gloves. Weigh the lye in a small plastic container and set aside. In a large non-reactive container, weigh your water. Slowly add the lye to the water, stirring well and avoiding the fumes. This step should be performed in a well-ventilated area due to the heat generated. Note! It will get hot FAST!
Step 3 – Weigh your fats/oils and melt the hard ones over low heat. Once melted, add the rest of your oils. Use a heat-proof vessel, like stainless steel or plastic, but avoid aluminum.
Step 4 – When both your lye solution and oils are 120 degrees Fahrenheit or less, slowly combine them, stirring well. You want to fully mix the ingredients, which takes time if hand-stirring. The batter will gradually turn into a smooth soap consistency resembling thin pudding. An immersion blender can make this process faster, but be sure to keep it submerged to avoid incorporating air. Keep checking for “trace” as you mix.
Step 5 – Once the soap batter reaches trace, where a line or ‘trace’ is visible when you drag a spoon through it, it’s ready to pour. If using, add your “add at trace” ingredients such as color or fragrance. Pour the mixture into your prepared mold and cover with a towel to retain heat without overheating. At this stage, you can remove your safety gear and clean your equipment. Some find it easier to clean the next day when the remnants have turned to soap.
Step 6 – Allow the mixture to sit until firm, typically about 24 hours, although the timing can vary. Cut the soap when it feels similar to cheddar cheese in consistency, avoiding crumbling or difficulty unmolding. Be aware that the saponification process continues in the mold, including a potential gel stage. This process is normal and expected.
Step 7 – After cutting the soap, place it on a rack in a dry place to cure for 4-6 weeks. During this time, it will become milder and develop a sudsy lather.
Conclusion to Soapmaking
You’ve learned the basics of soapmaking, from the chemistry of saponification to the materials and safety precautions required. While it might seem like a complex process at first glance, practice makes perfect. As you progress, you’ll become more comfortable and can start experimenting with different formulations and creative techniques. Happy soaping!